I Gave Claude 500 GB of Raw Footage. It Built a 29-Minute 4K Film.
A practical AI-assisted editing case study for first-time creators and experienced editors: 500 GB of footage, three rebuilds, custom cleanup, 3D maps and a finished 4K film.
I Did Not Ask Claude to Make a Montage
I came back from my first solo motorcycle ride with a problem that will be familiar to anyone who has ever recorded a trip: the experience felt like a film in my head, but the camera had produced a hard drive full of fragments.
There were roughly 500 GB of files, 50 long clips and about 13 hours of 4K footage from a DJI Action 5 Pro mounted on my helmet. There were sunrises, traffic, forest roads, phone calls, hairpins, tea estates, time-lapses, long stretches of wind noise and a lot of ordinary riding. Somewhere inside it was a story. I did not know where all of it was.
So I gave Claude Desktop a deliberately unreasonable assignment: inspect everything, find the story, build a cinematic travel documentary, edit it in 4K, grade it, repair the sound, create route animations, write subtitles, design thumbnails and prepare the YouTube upload. The raw footage had to remain untouched. I wanted a finished film, not a list of editing suggestions.
The final video is public now. You can watch the film on YouTube before reading the production story, or keep it open and compare the finished scenes with the decisions below.
The interesting part was not that an AI exported a video. It was that the job kept changing shape until the editing apps became only two components inside a much larger production system.
Thirteen Hours Had to Become Searchable Before It Could Become Watchable
The first useful thing Claude did was refuse to start cutting immediately. It probed the footage, meaning it read the files' technical properties without changing them, and established the baseline: 4K, 59.94 frames per second, HEVC and ordinary Rec.709 colour rather than a flat log profile. If those terms are unfamiliar, the practical conclusion is simple: the clips were high-resolution, high-frame-rate files whose colour was already display-ready. Applying the wrong log conversion would have damaged them.
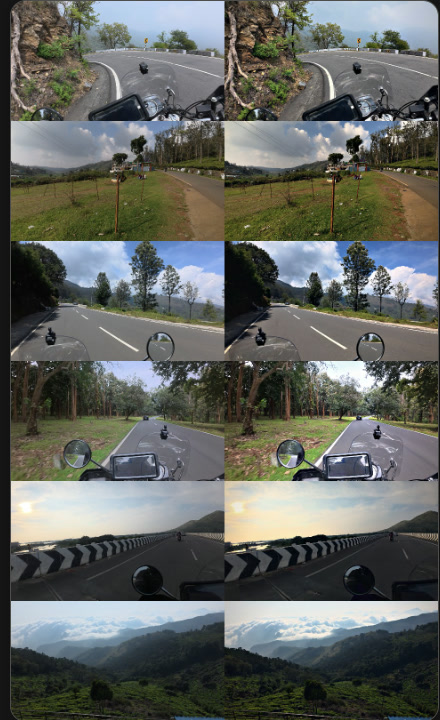
Then it tried to make contact sheets with a frame every 20 seconds. A contact sheet is simply a page of thumbnail frames that lets you scan a long video like a photo album. The local FFmpeg build did not include the drawtext filter, so the first approach failed. Claude dropped timestamp overlays, treated tile position as the clock, enabled hardware decoding and generated 72 sheets. In a later pass it extracted 982 labelled frames for a more precise review.
This converted the archive from "hours of video" into a visual index. Claude could now say that one clip contained a sunrise and a rider pointing at it, another had Dhimbam's hairpins, another had a roadside gaur, and a sequence of long static shots could become cloud time-lapses. It logged strong views, weak views, road signs, dialogue, traffic, arrival footage, thumbnail candidates and shots ruined by a hand, a phone or a tilted camera.
Transcription created a second index. A full pass was too expensive while frame extraction was running, so Claude stopped it and moved to targeted speech windows. It used word-level timings and separate Hindi/Hinglish translation passes for the scenes likely to contain story.
That is where the film stopped being a scenery compilation. The microphone had recorded a call asking for another room, a conversation explaining that my Coonoor booking had been cancelled, and a later line where I said the destination had changed to Kotagiri. Those recordings were not clean. They were mixed with wind, traffic and helmet noise. But they contained the plot.
A beginner does not need to learn every codec before starting. Ask the agent to inventory the files, create contact sheets and transcripts, and show you its proposed story before it edits. An experienced editor can go further by specifying proxy formats, colour management, frame-rate rules, naming conventions and the exact metadata the ingest report must contain.
The Footage Corrected the Story I Thought I Was Telling
My original description was simple: this was my first solo ride, I planned to travel from Bangalore to Coonoor, my stay was cancelled, and I went to Kotagiri instead. That is accurate, but it is not yet a film. A film needs to decide when the audience learns each fact and which facts the footage can honestly support.
Claude found a useful contradiction. The cancellation happened before Dhimbam, but the first explicit on-camera statement about Kotagiri came later. It did not force the route animation to match my summary. It let Coonoor fade after the phone call, kept the uncertainty alive through the ghat and recalculated the route only when the recorded dialogue established the new destination.
It also corrected the geography. NH 181 belonged to the original Coonoor plan. The actual climb to Kotagiri followed SH 15. A route service initially produced an 18-kilometre detour near Bannari, which looked plausible on a map but did not match the trip. Claude removed it. A stretch between Bannari and Mettupalayam had no usable footage, so the film used a map and narration instead of pretending that shots from somewhere else belonged there.
An agent can make a sequence feel smoother by inventing continuity. That is exactly what it should not do in a documentary. Missing footage is information. In this edit, the absence became a chapter called "The stretch I didn't film" rather than a reason to fake the route.
The final structure used a cold open from later moments, then returned to the departure. It moved through sunrise, open road, the cancellation, Dhimbam, the unfilmed stretch, the Nilgiris, Kotagiri, the next morning above the clouds and the return through Ooty, Mudumalai and Bandipur. A separate piece-to-camera clip eventually became an epilogue about solo and group riding.
This was the first lesson that surprised me: the agent was most useful when it treated my prompt as a hypothesis, not as ground truth. The raw material remained the authority.
You do not need editing vocabulary to judge this stage. You only need to answer human questions: What changed during the trip? What should the viewer learn first? Which moments are honest, and which are merely pretty? A trained editor will answer those questions with more control over reveal, rhythm and continuity, but the beginner and the professional are solving the same story problem.
The Film Was Rebuilt Three Times Because Each Version Exposed a Different Problem
These were not three routine exports of one unchanged timeline. Each was a new production approach prompted by a visible weakness in the previous result: Filmora established the first watchable cut, Resolve offered finer editorial and colour control, and the scripted pipeline was created when repeated repairs across hundreds of shots became too fragile to perform by hand.
The first complete version was assembled in Filmora. Claude configured the project for 3840×2160 at 29.97 fps, built an edit decision list, rendered 276 selected shots, aligned nine music stems and created 13 titles. It tested transitions, repaired weak shot choices and replaced paid title animations that would have introduced a watermark.
That Filmora build also produced one of the stranger failures. Its "Apply Changes" control copied the end-card style to every title, so the first export contained oversized chapter cards floating in the middle of the frame. Claude traced the problem to that global style change, restored the intended design to each affected title and exported a repaired Filmora cut. It ran 27 minutes and 26 seconds.
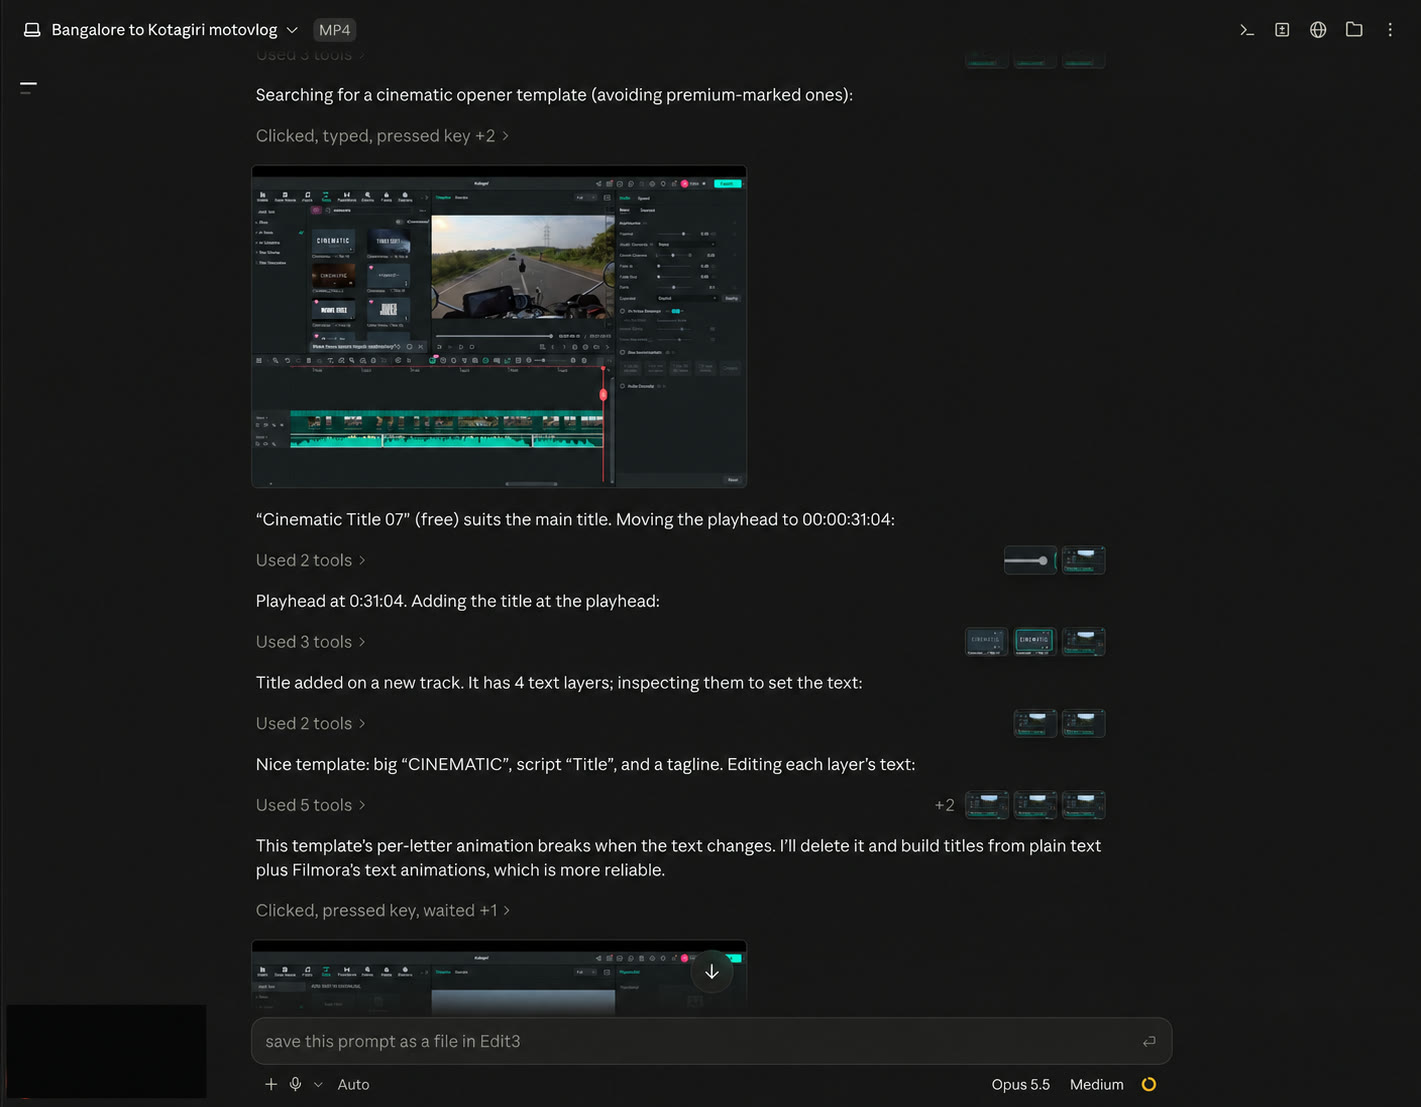
It was competent, but not the film I wanted. The colour work was shallow, subtitles were incomplete, the story was still thin and the music did too much of the emotional work. The Filmora version proved the footage could sustain a feature-length travel video. It did not prove the edit was finished.
The second build moved into DaVinci Resolve because the Filmora cut needed more precise colour, subtitle and timeline control. Claude generated FCPXML, imported clips, titles, voice-over markers and music, then used Resolve's Lua console to apply per-shot corrections. Moving the project revealed a new class of technical failures that had not existed in Filmora: macOS sandbox permissions prevented some media access, copied timecodes did not match the destination timeline, some dissolves pointed to missing references, the subtitle file did not create a subtitle track, and frame rounding shifted colour-grade keys away from their intended shots.
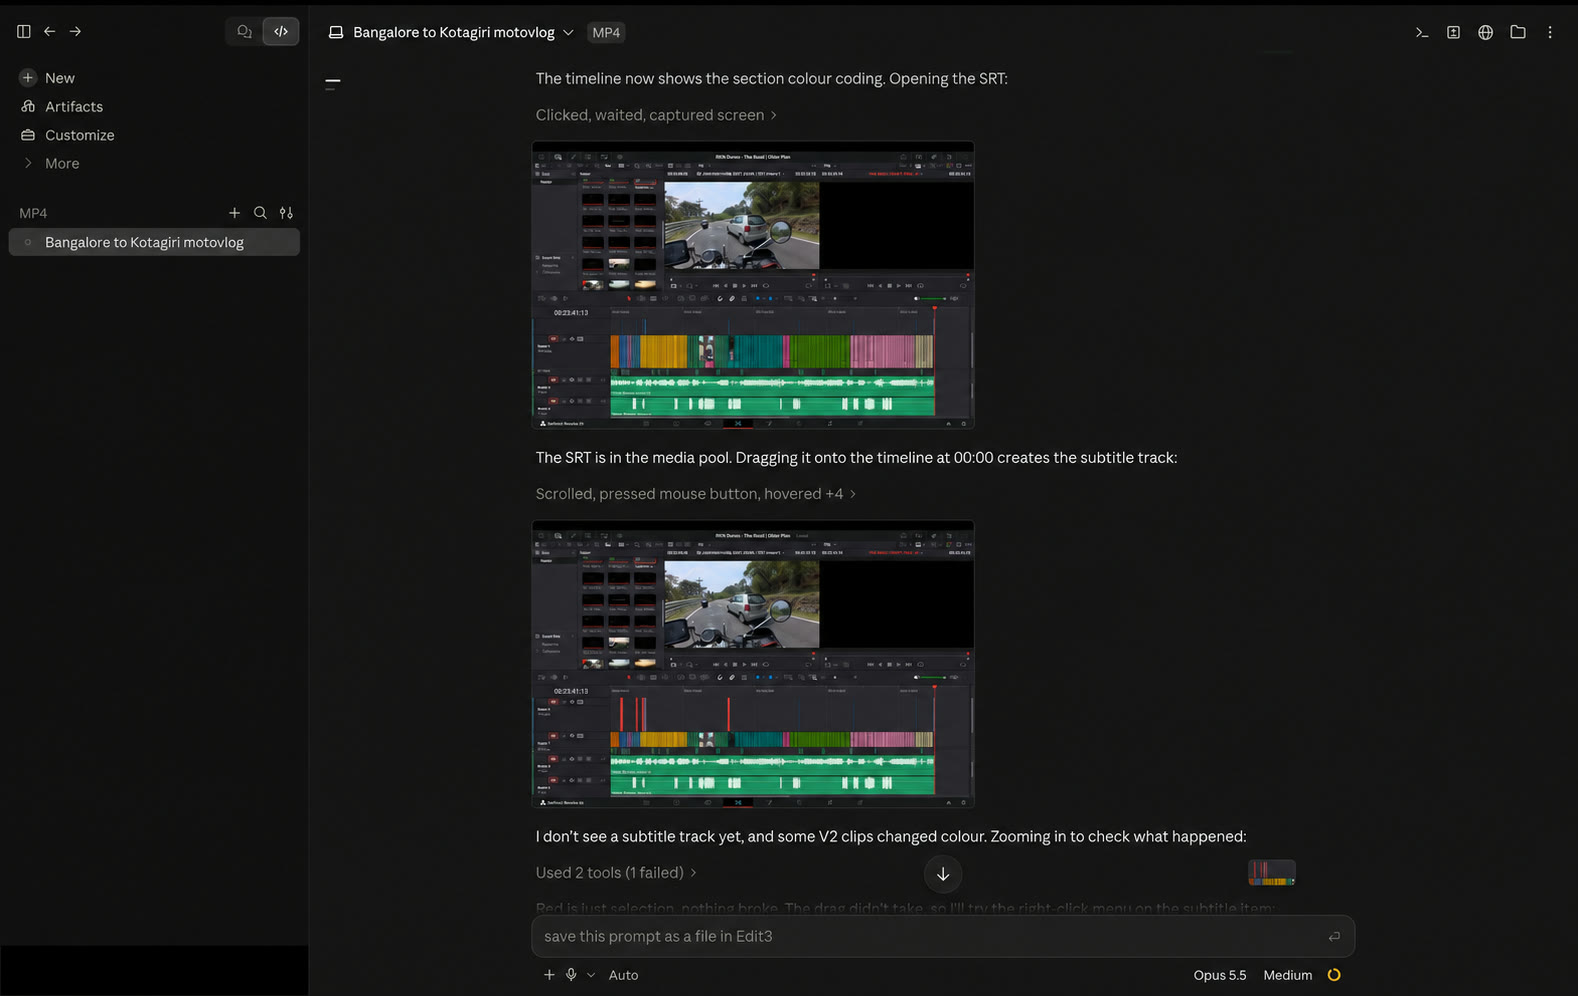
The third build was a response to those migration and repeatability problems. Instead of treating any editing application as the centre of the project, it recorded the timeline and processing rules in files that could be rebuilt consistently. Python handled the edit decision list and audio buses, Blender generated maps, Swift and Core Image graded the shots, OpenCV removed fixed spots, FFmpeg assembled the film, and Whisper produced transcripts and caption timings.
If you are new, start with Filmora or another editor whose timeline you can understand. Let the agent organise media, propose cuts and handle repetitive setup, but keep the project visually inspectable. If you already know Resolve, ask for proper bins, markers, handles, track layouts, colour-managed timelines and editable deliverables. Move work into scripts only when repetition, scale or a specialised repair makes code genuinely safer than hundreds of manual actions.
By the end, the surviving build folder contained more than 4,000 lines of pipeline code. That number is not impressive by itself. What mattered was repeatability: when review uncovered clipped skies, incomplete subtitles or speech leaking beneath the narration, Claude could change the relevant rule and rebuild every affected asset consistently instead of repeating hundreds of fragile mouse movements.
A Route Animation Is a Data Product Wearing Cinematic Clothes
The map sequences looked like motion graphics, but their real difficulty was data alignment. Claude did not screen-record a consumer map. It assembled Sentinel-2 cloudless imagery, Copernicus elevation data, OpenStreetMap road geometry and Natural Earth boundaries. The terrain lived in Web Mercator coordinates, recentred over South India, with one Blender unit representing one kilometre.
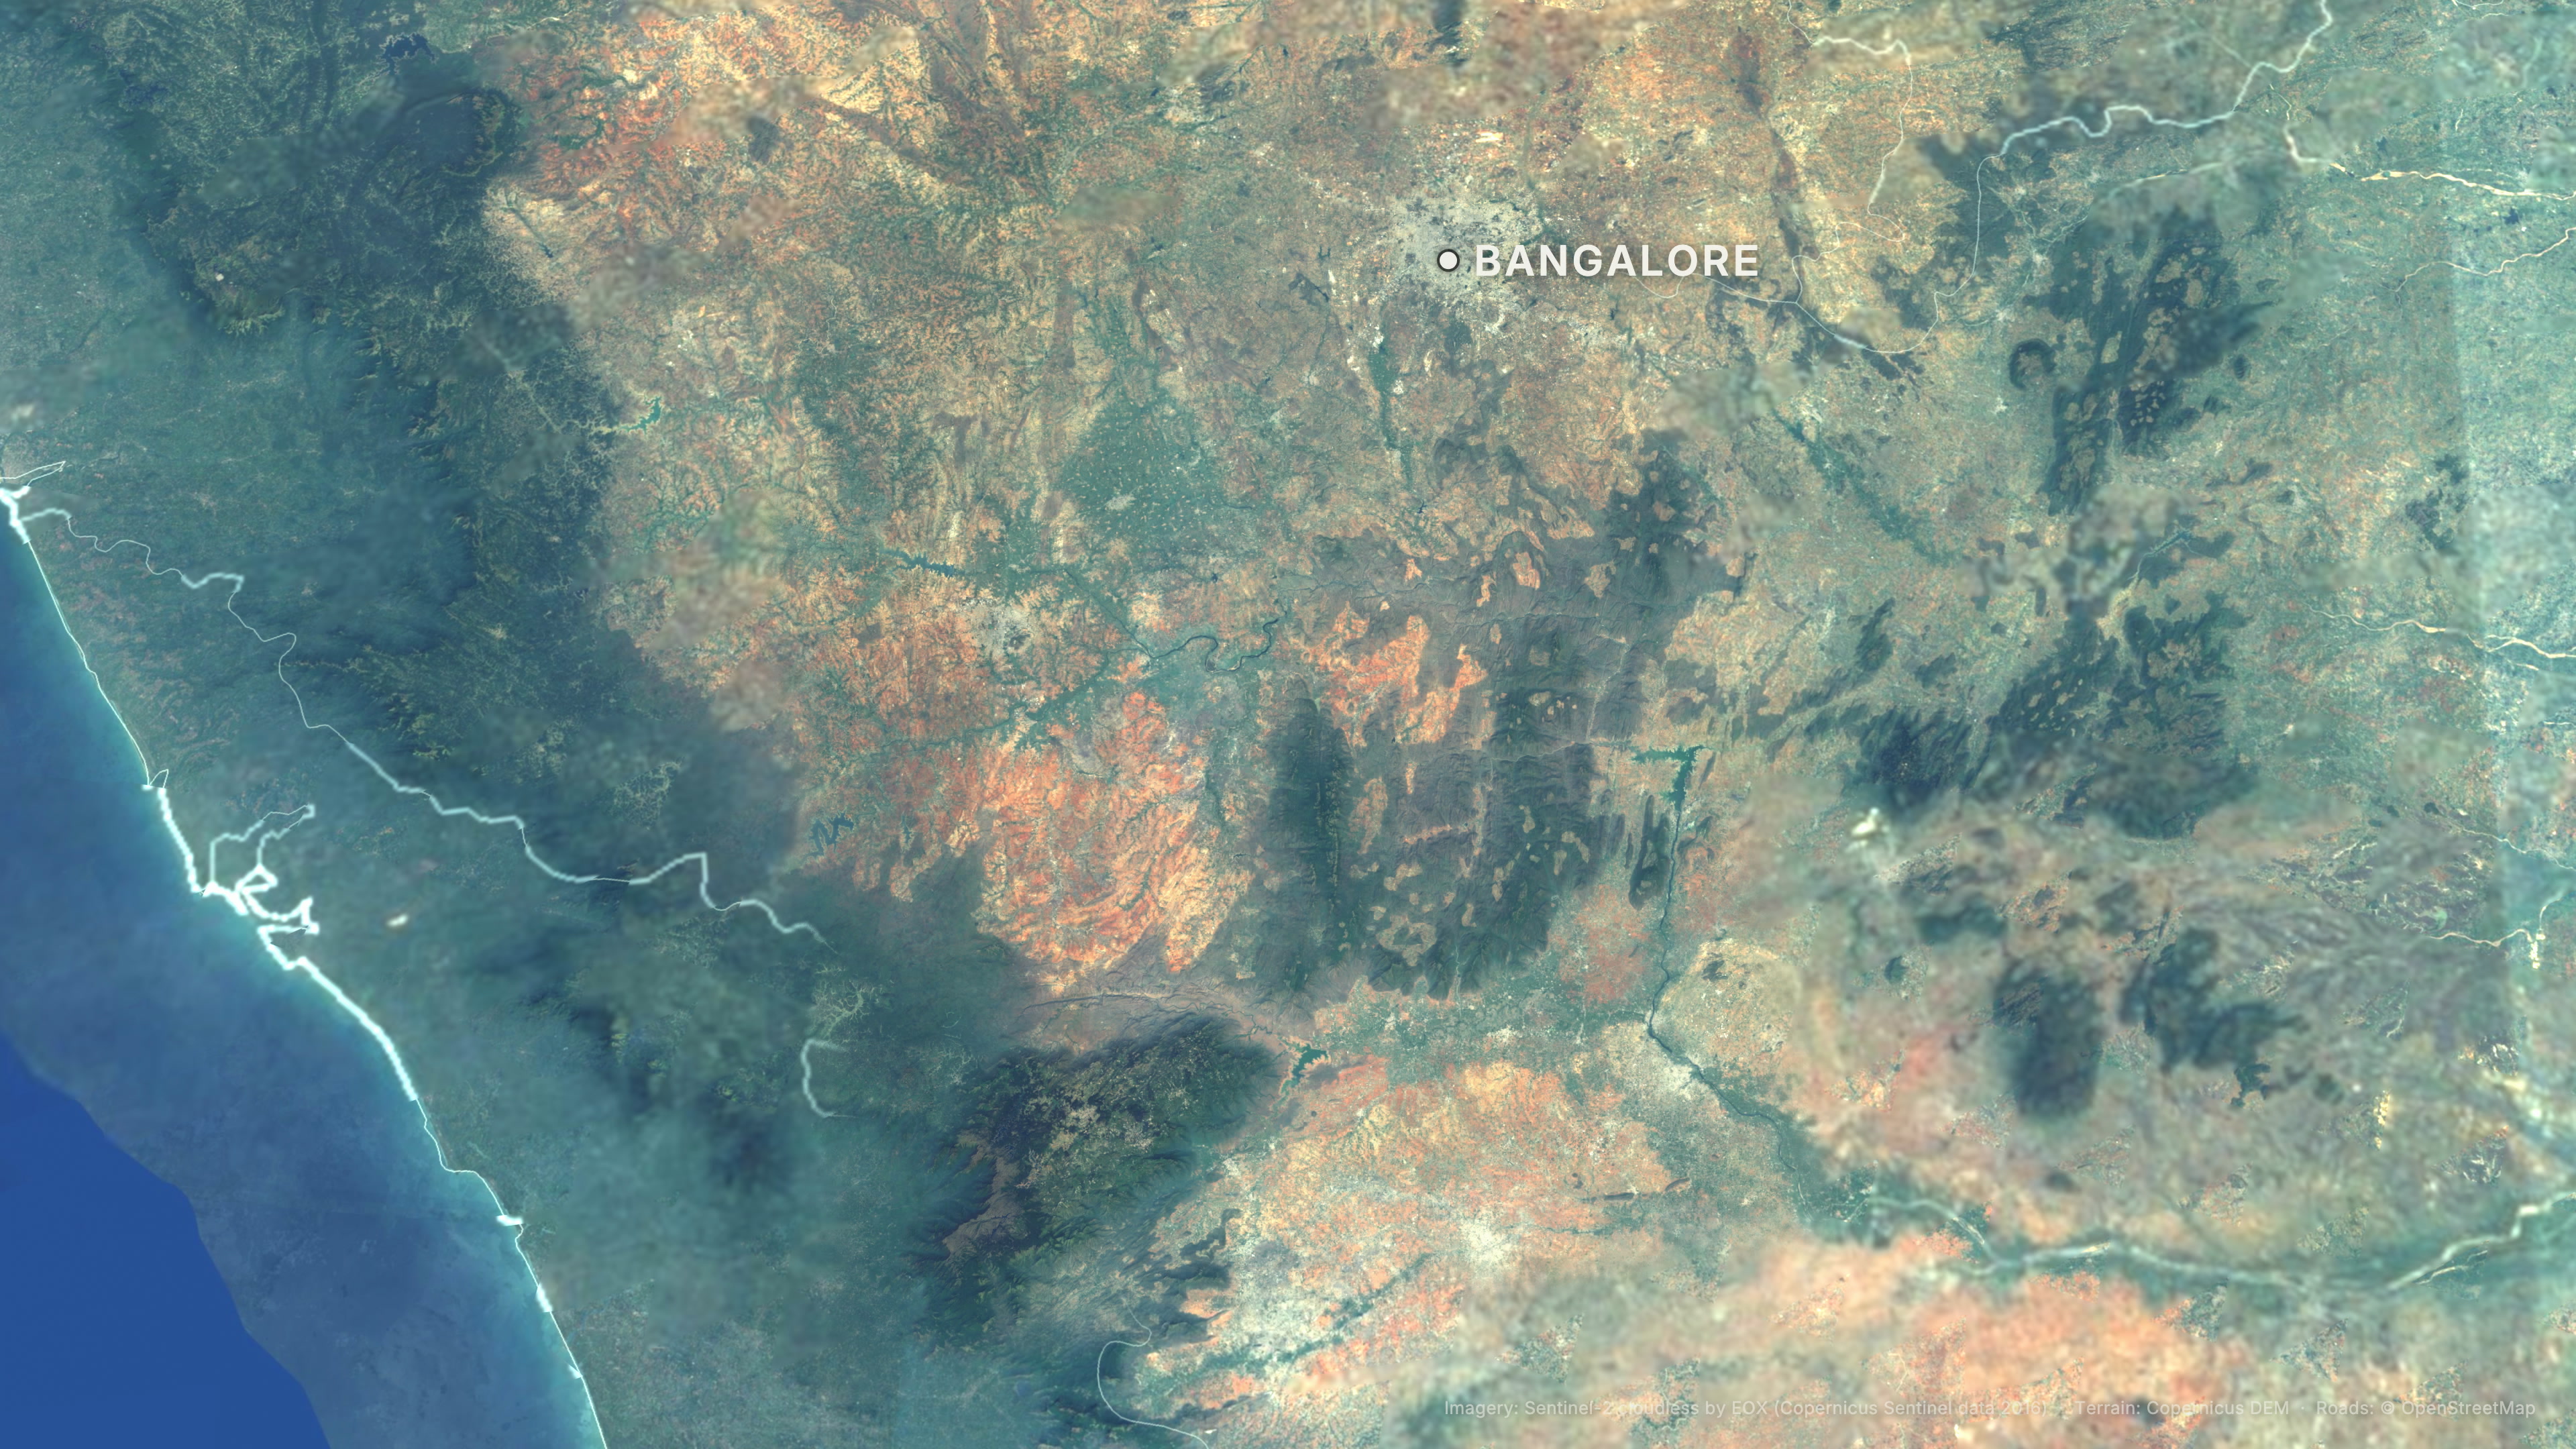
Multiple imagery levels were necessary. A wide India view needed a low zoom. Dhimbam and the Nilgiris needed much sharper tiles. Hard boundaries between those layers created visible seams, so Claude feathered the textures and tapered the terrain. Routes were draped onto the height surface and rendered as amber emissive curves. A simple glowing marker followed the road.
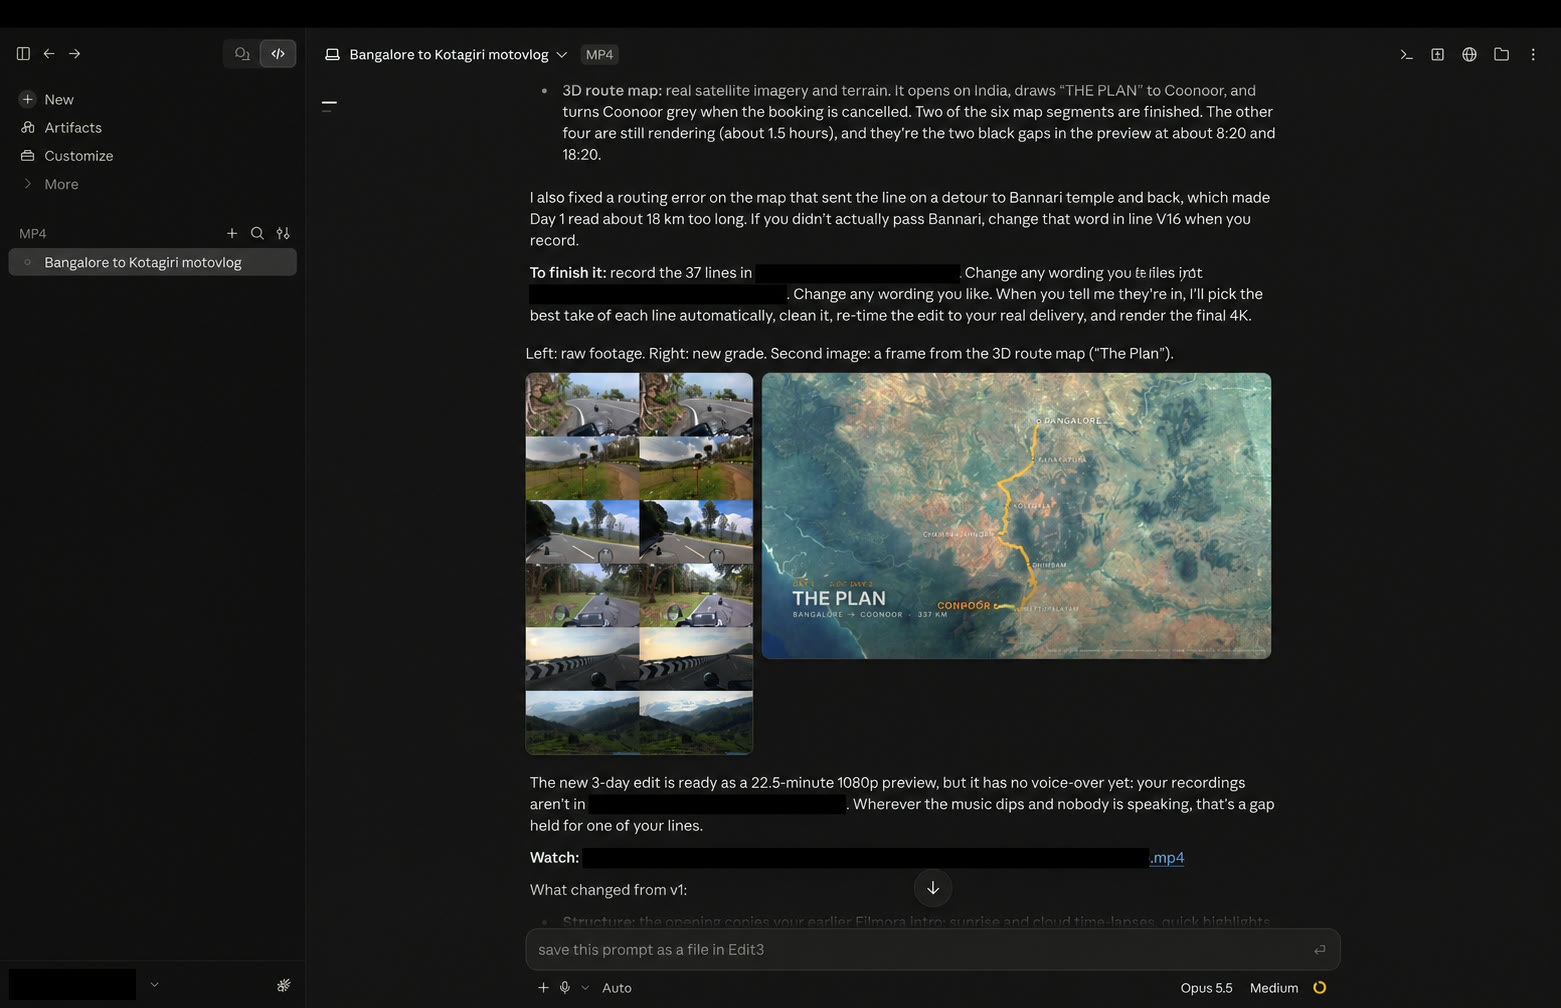
Six sequences were eventually built: the original plan, the cancellation, Dhimbam, the recalculation to Kotagiri, Day 3 and the return home. Per-frame camera projection data was exported to JSON so labels could be rendered separately and stay pinned to the moving terrain.
| Map problem | What caused it | What fixed it |
|---|---|---|
| Terrain rendered black | A world-volume and lighting change absorbed the scene | Mist-pass haze and rebuilt lighting |
| Satellite seams | Hard edges between zoom layers | Feathered alpha and terrain tapering |
| Coonoor left the frame | Camera path prioritised the route marker | Reframed the shot before the long render |
| Labels collided | Too many names in the final loop view | Simplified the label set and moved captions |
This part of the project changed how I think about "AI animation". The agent did not conjure a convincing map from a sentence. It had to collect sources, resolve roads, build meshes, debug lighting, protect attribution and review every camera move. The generated result was only as trustworthy as the geographic pipeline underneath it.
The 3D route maps are an advanced layer, not a requirement for making your first good travel video. A beginner could use a clean static map or a simple animated line. An experienced motion designer could improve the same Blender scenes with better camera easing, label hierarchy, atmospheric depth and transitions that match the edit. The important principle at both levels is accuracy: the map should clarify the journey, not decorate it with a route that never happened.
The Voice Clone Was Technically Correct and Emotionally Wrong
For a while, the most ambitious branch of the project was voice cloning. Claude separated clean speech references, tested Chatterbox on the Mac's GPU, installed F5-TTS, corrected dependency conflicts and generated multiple takes. It transcribed the output to verify the words, measured speaking rate, pause length, pitch range and sentence endings, and tried to select takes closest to my real speech.
The voice sounded like me. The delivery did not.
One version was robotic. The next sounded poetic. Another started naturally and then slowed down until the energy disappeared. Time-stretching solved duration while making the performance worse. Better reference clips transferred a little more expression, but they could not supply the emotion of remembering a booking cancellation, riding alone or seeing the Nilgiris for the first time.
Timbre is not authorship. A cloned voice can reproduce the surface of a person while missing the reason that person is speaking.
I recorded 37 lines in Voice Memos instead. That introduced an unexpectedly manual problem: macOS protects the Voice Memos library from ordinary terminal access. Claude tried dragging recordings out, failed, then discovered that copying a memo placed its audio on the clipboard. It exported the files one by one, preserved their V01-V37 names, cleaned them, detected the takes and retimed the edit around my real delivery.
The recordings ran for about 13 minutes, roughly twice the early estimate. Claude did not compress them into the old timeline. It expanded and trimmed the film around them. An additional iPhone HDR piece-to-camera was rotated correctly, converted to SDR, cleaned and used as a two-minute epilogue.
We abandoned the most impressive-sounding feature. The final video contains my real narration, not an AI clone. The experiments were useful because they showed precisely where synthetic speech stopped being good enough.
For a new creator, this is reassuring: you do not need a studio voice or complicated cloning setup. A phone recording in a quiet room, one line at a time, gives the agent clean material and preserves your personality. An experienced sound editor will get more from microphone technique, room treatment, noise control and performance direction than from endlessly tuning a synthetic voice.
The Hardest Bug Was a Voice I Could Barely Hear
The first real-voice 4K render still had a serious problem. Claude had reused the source camera audio as the ambience bed. Whenever the new voice-over played, fragments of my original on-camera speech survived underneath it. The overlap was faint, but it made the sound feel confused. At the same time, too many good helmet-camera lines had been replaced by narration.
The fix required reprocessing every relevant source clip with Demucs, a tool that separates a recording into components. Each clip produced two stems: a VOICE stem for speech and an AMB stem for everything else - engine, road, wind, birds and traffic. Think of stems as separate audio layers. The final mixer never treated the untouched camera track as background sound.
Claude then restored 12 more on-camera lines and removed or shortened narration that repeated them. My real speech ended up occupying about 10.6 minutes, against roughly 10 minutes of recorded voice-over. Hindi and Hinglish lines were translated into English subtitles.
| Sound layer | What it contained | How it was treated |
|---|---|---|
| Ambience | Road, engine, wind, birds and traffic with speech removed | Kept beneath the edit without reintroducing old dialogue |
| On-camera dialogue | Cleaned speech recorded during the ride | Levelled near -16 LUFS |
| Narration | The newly recorded Voice Memo lines | Levelled near -16 LUFS |
| Music | A continuous multi-track score | Lowered smoothly around every spoken line |
Those four layers were combined into a master targeting roughly -14 LUFS, with a true-peak ceiling near -1 dB. Music ducking eased in over about 0.6 seconds and recovered over about 1.4 seconds so it did not jump abruptly around speech.
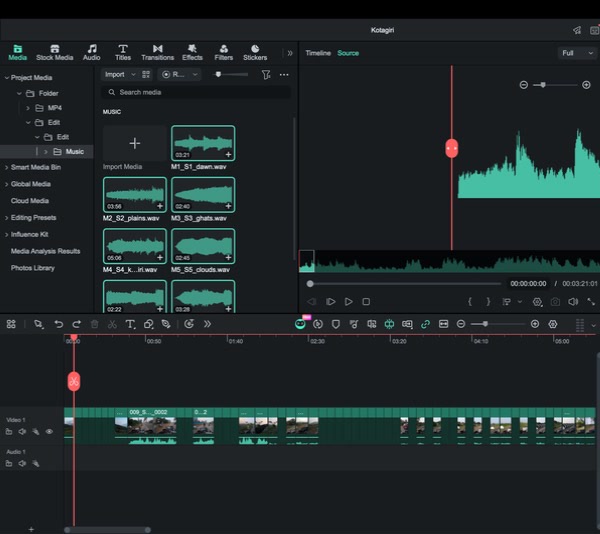
The score used multiple Epidemic Sound tracks, but the transitions overlapped for six seconds so the bed never collapsed. Near-silent track introductions were skipped. Short speech gaps remained ducked so the music did not pump between sentences. Quiet musical passages were slowly levelled rather than crushed.
The automated checks eventually reported no voice-over/dialogue overlap, no speech leaking into ambience, no music dropouts and a speech-line spread of about 0.2 loudness units. The final master landed near -14 LUFS with approximately -0.9 dB true peak. LUFS describes perceived loudness across time; true peak estimates the highest playback peak after conversion. A beginner can treat these as delivery targets. An experienced mixer can treat them as guardrails and still shape dynamics by ear.
The Grade Looked Good Until I Stopped Looking at the Road
Colour was another case where a locally good result hid a global failure. I liked the treatment of the roads, grass, trees and sunrise. But when I watched the film again, the skies in many shots were almost white.
Claude measured the top third of every graded shot and found 47 of 196 with mostly near-white sky. It compared those frames with the source and discovered that the camera had retained cloud detail. The grade had destroyed it.
A whole-frame exposure reduction would have recovered the clouds by making the correctly exposed road, vegetation and motorcycle too dark. Claude therefore added a selective highlight-recovery pass that behaved more like a graduated filter: it targeted only very bright pixels near the top of the frame, rolled them down smoothly and preserved the parts of the existing grade that already worked. On the worst frames, the area measured as near-white fell from roughly 40-58 percent to almost zero.
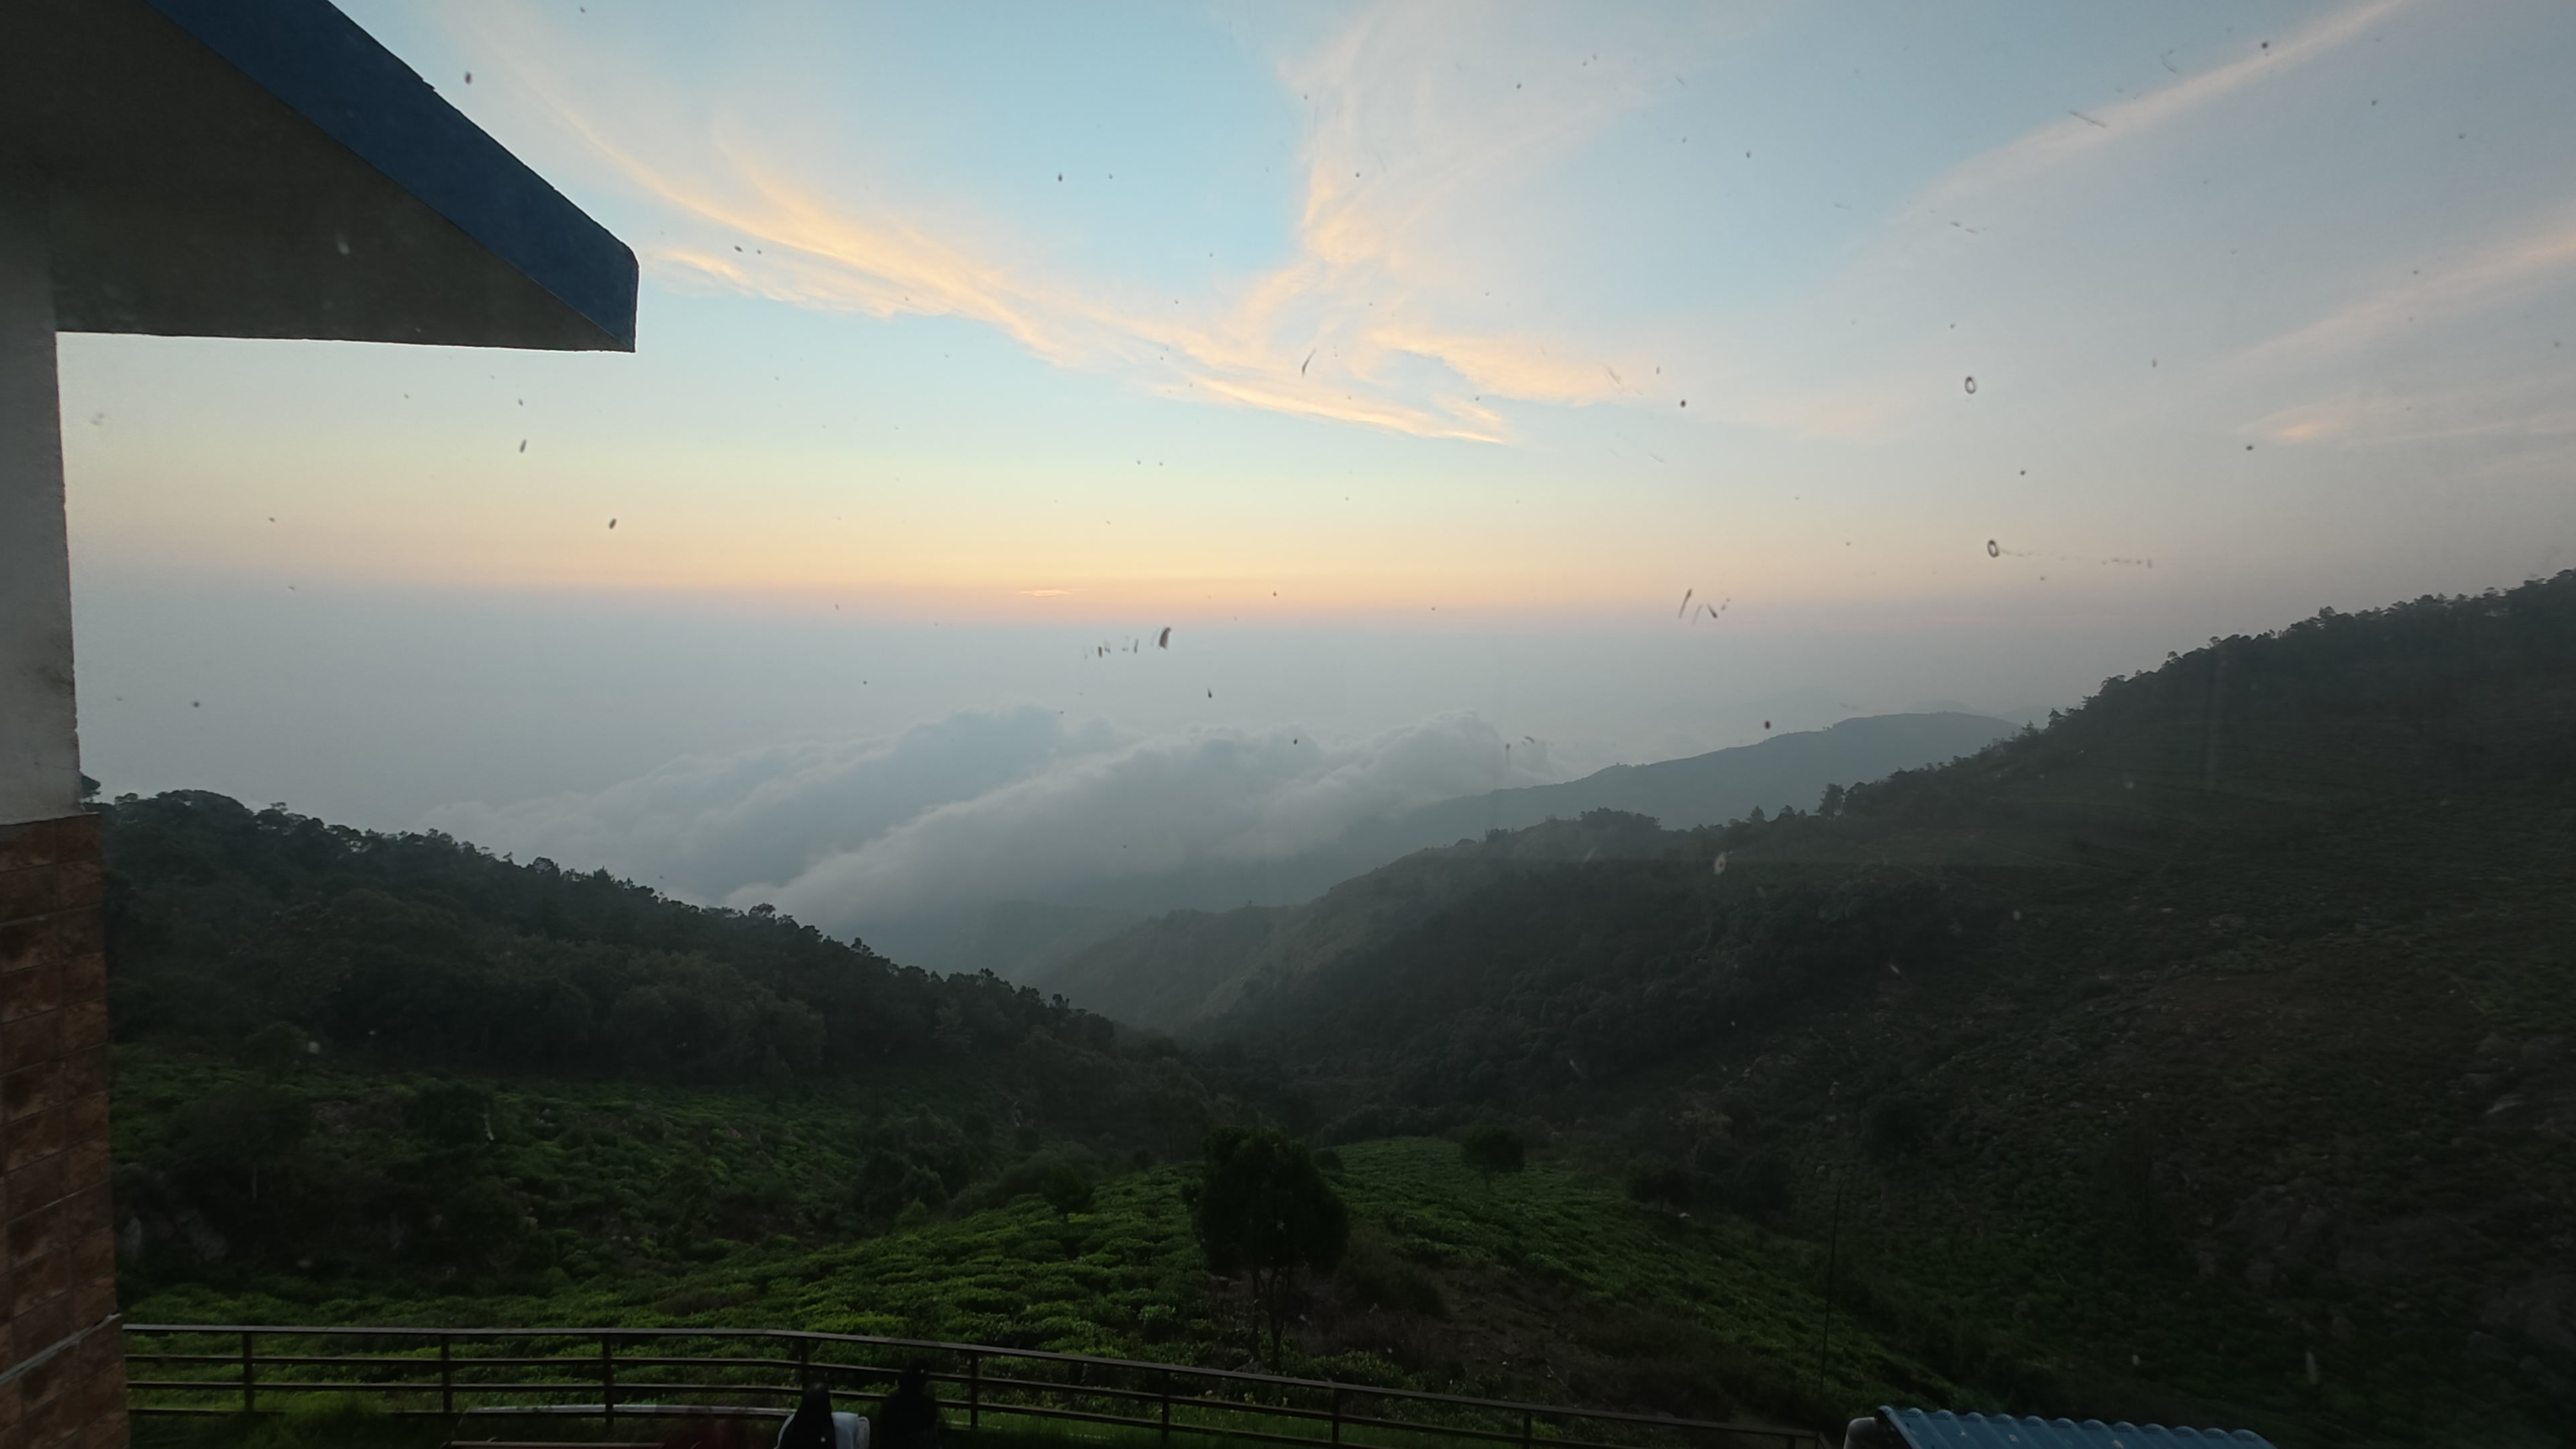
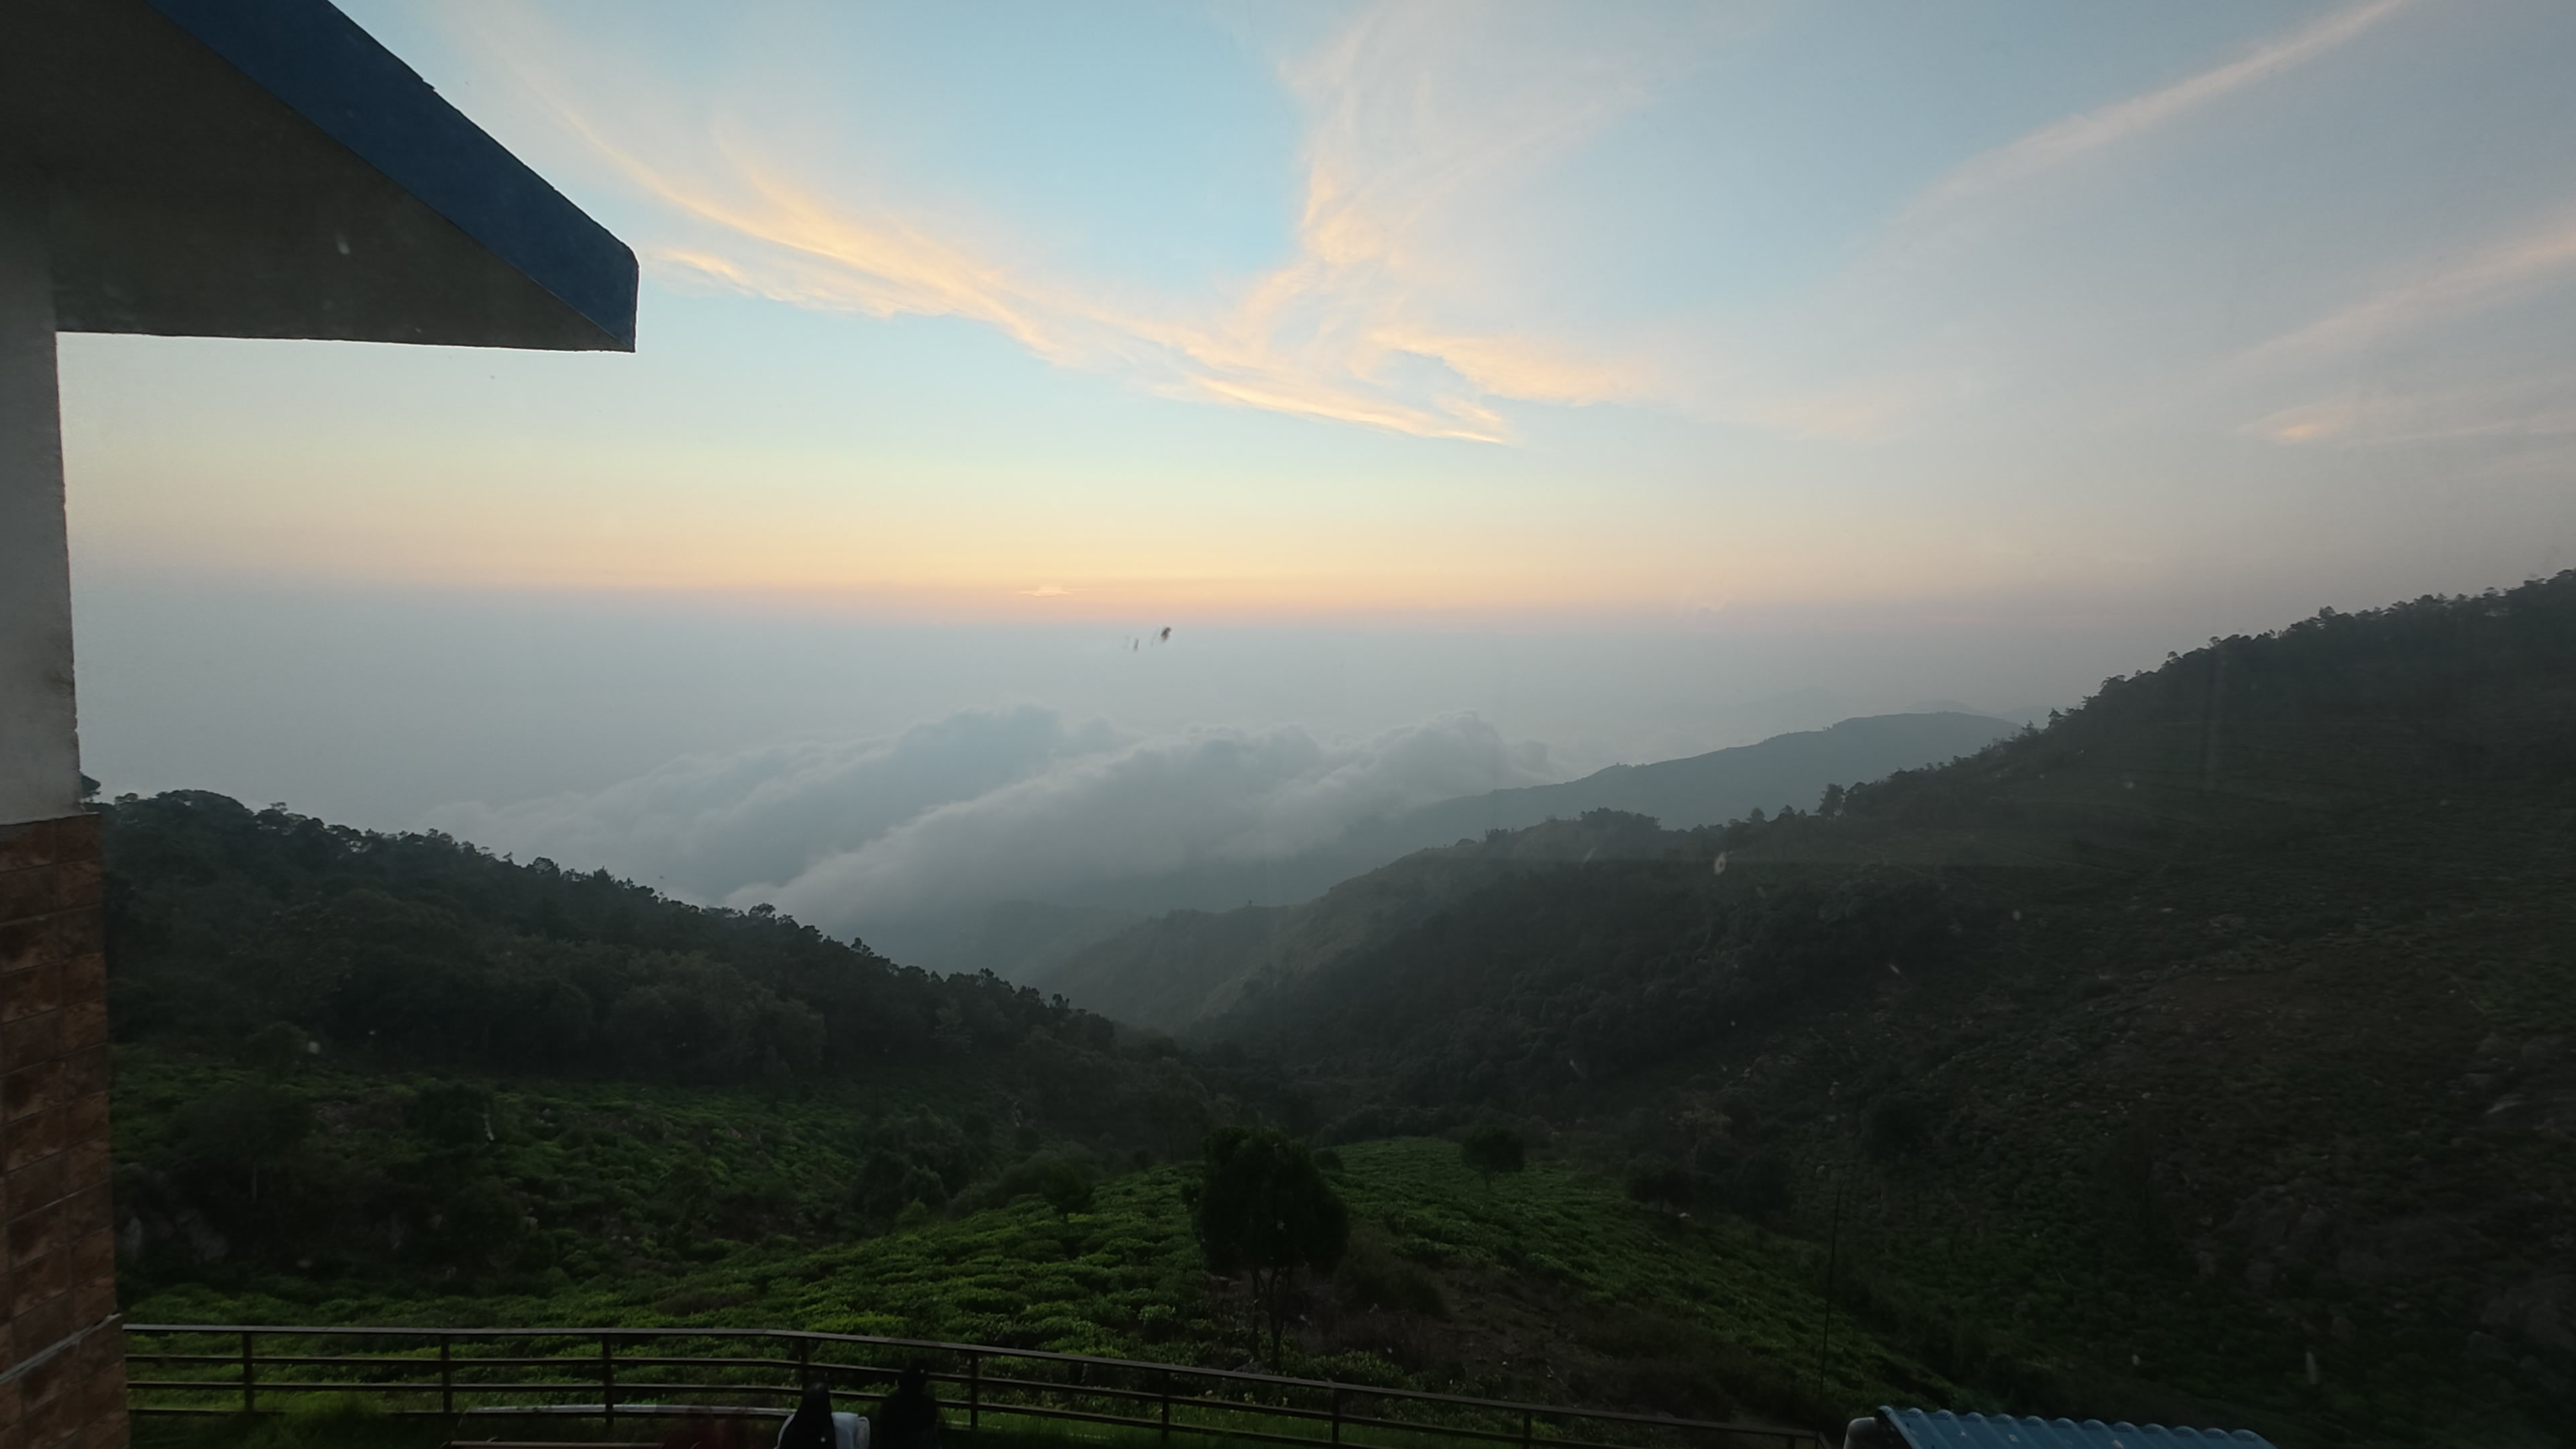
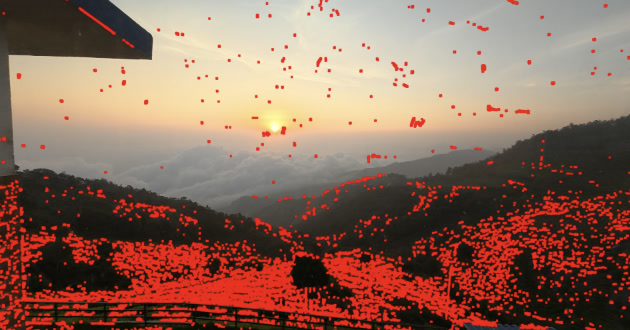
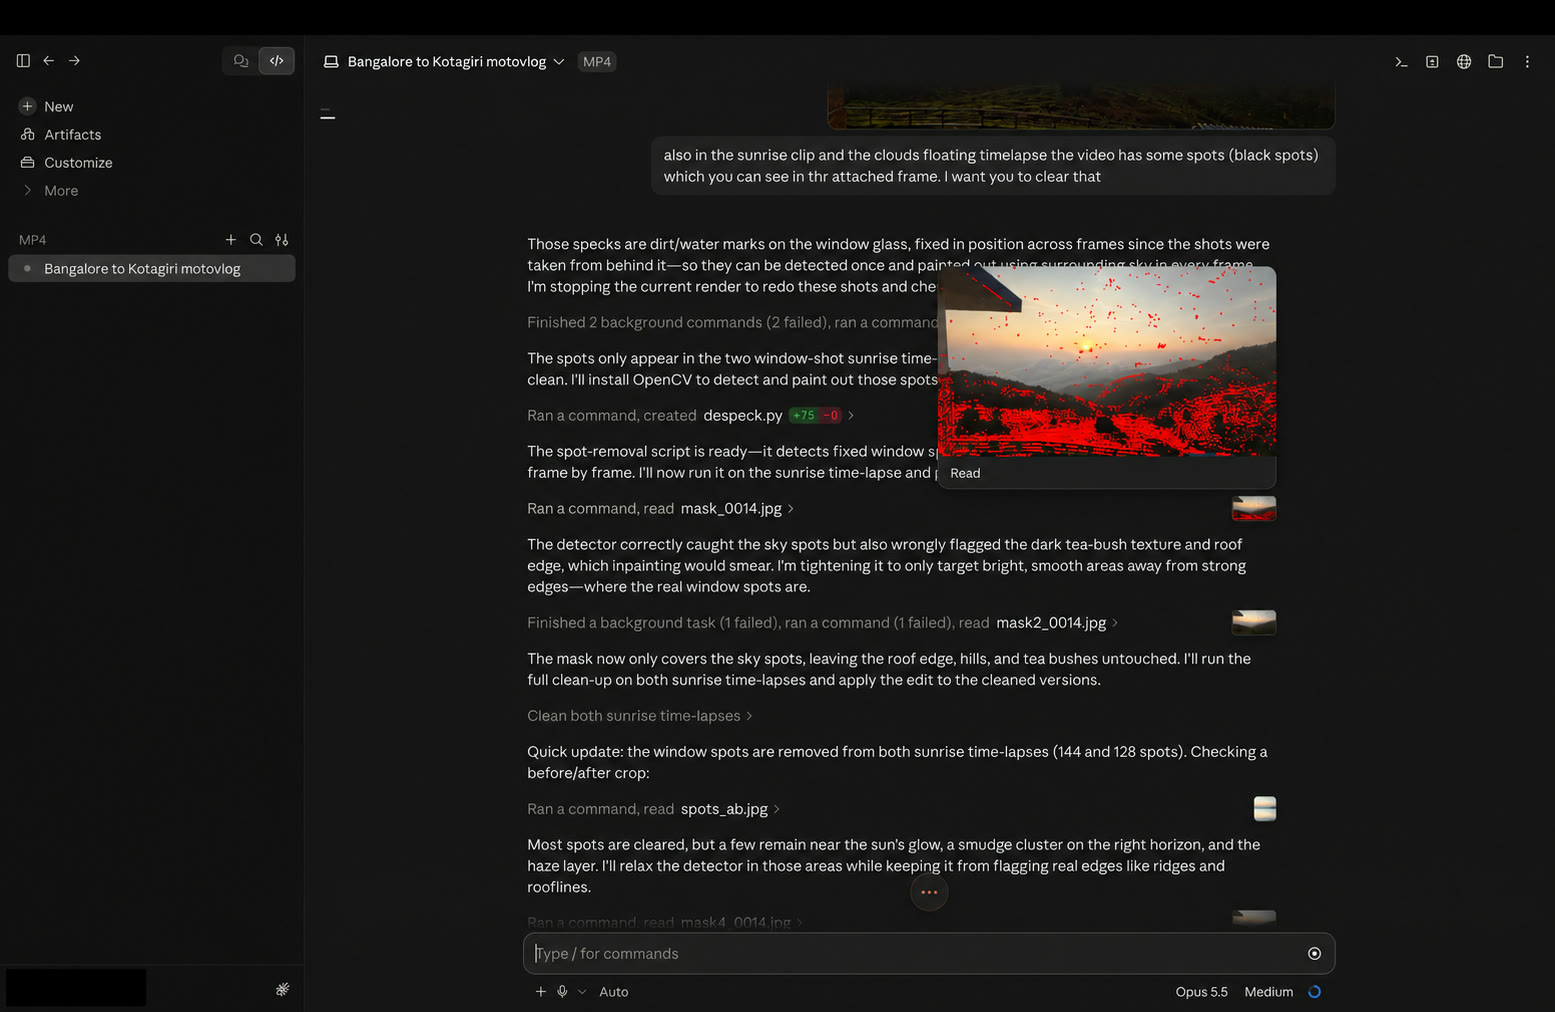
Then there were the black marks in the sunrise time-lapses. They were not dead pixels or distant birds. They were dirt and water spots on glass, fixed in position while the sky moved behind them. Claude used temporal comparison to detect stationary dark deviations in smooth bright regions, excluded textured hills and roof edges, and inpainted the spots frame by frame with OpenCV.
Subtitle review revealed a separate consistency problem: some early exports captioned selected on-camera dialogue but left other spoken sections—including narration—without text. That made the captions feel accidental rather than accessible, so I set a clear rule: subtitle every audible voice or remove subtitles entirely. Claude rebuilt the caption assets under that rule. The uploaded film contains 267 consistently styled burned-in cards covering narration, camera speech, translated Hindi/Hinglish and the epilogue, plus a separate timed SRT for optional YouTube closed captions.
If you are new to colour, ask first for neutral exposure, natural skin and preserved sky detail. Only then ask for warmth, contrast or a cinematic look. If you already grade, specify scopes, colour management, shot matching, highlight roll-off, isolation masks and the acceptable clipping threshold. The agent can execute measurable rules, but an experienced eye is still better at deciding whether a sequence feels coherent.
You Do Not Need Every Tool Here, but You Should Know What Each Layer Solved
Calling this a "Claude edit" can make the work sound as if one model generated the finished MP4 directly. It did not. Claude acted as the operator and engineer across a collection of specialised tools. Some were ordinary production applications, some were open-source media libraries, and some were scripts written specifically for this film.
Filmora 16 handled the first assembly and taught the project what worked about the intro, title rhythm and broad pacing. DaVinci Resolve 21.1 handled the second story cut, per-shot corrections, timeline look and high-quality exports. Neither application remained the single source of truth in the final build. The repeatable work moved into code.
| Tool | Role in the project | What happened to it |
|---|---|---|
| FFmpeg and ffprobe | Metadata, frame extraction, audio decode, contact sheets, transcodes, filters, chunk assembly and final muxing | Core part of every version |
| MLX Whisper large-v3-turbo | Speech transcription, word timings, take detection and English captions | Used in the final pipeline |
| Demucs htdemucs | Separated rider speech from wind, engine, road and environment | Used for every relevant final source clip |
| DeepFilterNet | Dialogue-cleanup experiment | Useful in tests, rejected as the main cleaner because it could garble speech |
| Chatterbox and F5-TTS MLX | Voice-cloning experiments and prosody variants | Rejected; no cloned narration remained in the film |
| Blender 4.5 | 3D terrain, camera moves, road lines and route marker | Rendered all six final map sequences |
| OpenCV | Detected and inpainted fixed dirt/water marks in sunrise time-lapses | Used in the uploaded final |
| Swift, Core Image and AVFoundation | GPU-accelerated colour pipeline and 10-bit HEVC shot encoding | Replaced slower CPU and PyTorch grading paths |
| PyTorch on Metal | Experimental 3D-LUT and GPU grading path | Profiled, then superseded by the native Swift grader |
| Skia and Pillow | Anti-aliased labels, titles, subtitles, thumbnails and map overlays | Used across graphics generation |
| pyloudnorm, NumPy, SciPy and SoundFile | Loudness measurement, buses, envelopes, limiting and WAV output | Powered the final audio mixer |
The map also depended on external data rather than a generative shortcut: Sentinel-2 cloudless imagery from EOX, Copernicus GLO-90 elevation, OSRM/OpenStreetMap route geometry and Natural Earth borders. The final description credits those sources.
What the 28 automation files did
Claude produced 28 retained automation files during the project. Their value is easier to understand by grouping them by responsibility rather than listing their filenames or source code:
| Number of files | Production responsibility | What they accomplished |
|---|---|---|
| 3 | Editorial decisions | Recorded successive timeline revisions, including source clips, in-points, durations, speed changes, dialogue, narration, titles, maps, music and natural sound. |
| 8 | Dialogue, narration and mixing | Separated speech from ambience, cleaned targeted dialogue, processed Voice Memo takes, selected usable words, built four sound layers, ducked music and mastered the soundtrack. |
| 4 | Colour and picture repair | Defined the visual look, tested GPU grading, created the fast 4K grading route and removed fixed dirt and water marks without damaging textured areas. |
| 4 | 3D route maps | Prepared satellite and elevation data, built the Blender terrain, projected route labels, added pins and credits, and encoded the map sequences. |
| 6 | Titles and captions | Generated title cards, burned-in subtitles and the separate timed caption file used by YouTube. |
| 3 | Finishing and delivery | Assembled the graded shots, maps, titles, subtitles and dissolves, added the mastered audio, produced thumbnail options and rebuilt chapters and upload metadata after the timing changed. |
The colour pipeline is a good example. An FFmpeg filter approach was too slow. A PyTorch implementation on Apple's Metal backend needed a hand-written 3D LUT lookup and still competed with Blender. Claude then wrote a native Swift tool with Core Image filters, an AVAsset reader/writer and hardware Main10 HEVC output. It reportedly reached about 32 frames per second at 4K, roughly 30 times the slow CPU experiment.
The cleanup automation was equally specific. It did not apply a generic beauty filter. It looked for marks that stayed fixed while the sky changed, rejected textured and high-edge regions, expanded the safe mask and used inpainting only inside it. This is the difference between saying "clean the video" and defining what clean means for one class of defect.
For a beginner, the important point is not the programming language: each automated stage accepted a known input, performed one repeatable job and produced something that could be checked before the next stage began. An experienced editor can reuse that architecture with Resolve automation, Fusion, Fairlight, command-line tools or an entirely different NLE. The transferable idea is to make every automated stage inspectable and replaceable.
The Production Failures Were More Interesting Than the AI Demos
A long-running agent does not fail like a single prompt. It fails like a small production team with fragile infrastructure.
The Mac reached one percent battery during the Resolve build. Claude stopped, saved the project and copied scripts out of a temporary directory before the machine could shut down. Disk space fell below what the 4K pipeline needed more than once. Old renders were moved to Trash first, then removed only after approval. At one point a 4K render failed because a replacement shot asked for frames beyond the end of its source clip. The EDL was corrected and the render restarted.
Resolve's App Store sandbox blocked media until folders were granted through the interface. Its console used Lua rather than Python. A 59.94 drop-frame timecode copied into 29.97 time-lapses made imports invalid. Grade keys drifted because Resolve accumulated rounded frame durations differently from the script. Subtitle import silently failed. A Blender lighting change turned the terrain black. A hardware-assisted dissolve produced a suspicious frozen frame that had to be isolated and inspected.
The upload had its own boundary. The finished file was about 17.8 GB, while the browser extension could transmit only 10 MB. The extension was connected to a different browser profile from the channel, so Claude could see the Studio window but not control it. I selected the video and filled the remaining fields from Claude's exact instructions.
Claude did not watch every final render from beginning to end in real time. It said so. Instead it generated contact sheets, checked representative frames, verified streams and duration, detected black frames, measured loudness and peaks, checked source bounds, scanned for duplicate shots, measured sky clipping, tested music continuity and compared speech spans.
That disclosure matters. Automated QA is not the same as human viewing. The project worked because the two alternated: Claude measured what a machine could measure, and I kept finding the things that felt wrong.
For a beginner, the safest review loop is simple: export a short preview, watch it on headphones and a phone, write down every moment that feels confusing, then ask for specific changes. For an experienced editor, automated QA can sit beside the normal review process and catch mechanical errors before the creative pass: illegal source ranges, missing media, clipped highlights, caption gaps, loudness drift, duplicate shots and broken handles.
Agentic Work Is Not One Prompt. It Is a Negotiation Between Evidence, Taste and Recovery
The finished film is not proof that editors are obsolete. It is proof that the boundary of an editing project can expand dramatically when an agent can inspect files, write code, control applications, use a browser and keep state across days.
I also do not want to present the finished video as professional-grade post-production. An experienced editor will notice choices that could be more refined, from pacing and transitions to colour consistency and the final sound mix. But I began with little to no knowledge of video editing, and from that starting point the output is genuinely impressive. It turned an intimidating 500 GB archive into a coherent film I could publish. Someone who already understands Filmora or DaVinci Resolve, knows what those applications can do and can give the agent more precise creative direction could take the same approach much further.
Claude was excellent at exhaustive work: indexing footage, converting timings, generating variants, rebuilding maps, normalising speech, checking source bounds and preserving a reproducible pipeline. It was weaker at judgement that depends on sustained human perception. The voice clone was technically convincing but emotionally false. The road grade looked strong while the sky was broken. A music bed could be mathematically continuous and still feel misplaced until the real dialogue returned.
If I repeated this project, I would put these rules in the first prompt:
- Real voice first. Use narration only where the rider is silent, and never let source dialogue survive under voice-over.
- Protect the sky separately. Do not solve land and clouds with one exposure decision.
- Build the evidence layer before the edit. Contact sheets, transcripts, tags and source bounds come first.
- Treat missing footage honestly. Maps and narration can explain an absence; unrelated B-roll cannot.
- Reserve operational headroom. A 4K pipeline needs disk space, power, persistent working files and clear deletion rules.
- Specify delivery constraints early. Browser profile, upload limits, captions, thumbnails, metadata and visibility are part of production.
If you have never edited before
Do not begin by requesting every technique in this article. Start with one small project and ask the agent for an inventory, a story outline and a low-resolution preview. Protect the raw files. Use your real voice. Review the result for truth, clarity and feeling before worrying about LUTs, codecs or 3D maps. Your advantage is not technical vocabulary; it is that you know what the experience meant.
If you already know the tools
Treat the agent as a junior post-production team that can work continuously but needs an exact brief and strong supervision. Define the timeline standard, media strategy, handles, colour pipeline, audio buses, naming rules, interchange format, revision boundaries and QA thresholds. Keep the project editable. Use automation to remove repetitive labour, then spend your own time on the decisions the system cannot measure: performance, rhythm, emphasis, restraint and taste.
The project began as "take control of Filmora" and ended as a small post-production system. That shift was the real result. The 29-minute video matters, but the reusable asset is the pipeline and the set of failures it now knows how to avoid.
An autonomous agent can carry an enormous amount of production labour, especially for someone who does not yet know how to perform all of that work manually. But it should not be trusted to declare its own work finished. The best workflow is not human versus AI. It is an agent that can measure and rebuild, paired with a human who can still say, "The road looks right, but look at the sky." Add an experienced editor who understands the tools deeply, and the ceiling becomes much higher.
Related essays
- AI Tooling · Cost Optimisation
I Was Drowning in AI Token Limits. Then I Found a Hack That Compresses Text Into Images.
How one developer's frustration with Claude's token costs led to discovering pxpipe - a tool that packs 18 million characters into a 1M token window by converting text to images.
- AI Engineering · LLM
Prompting vs Looping: Why Most Engineers Are Burning Through AI Credits Wrong
The difference between prompting and looping in AI models like Claude isn't about cost - it's about control. Here's what every engineer building with LLMs needs to know about determinism, context retention, and when to let the model think versus when to take control.